Showing posts with label sewing. Show all posts

Wednesday, December 10, 2014

Teacher Christmas Gifts

A photo posted by katrina (@khcalgary) on

A friend of mine in our guild showed me the most beautiful bags she had made for her family for Christmas. She used a pattern from In Color Order blog, which also has a free tutorial which I used to make my bags.  It is a very simple pattern to follow with excellent instructions and photos. I added a layer or fusible fleece to the main print of the bag so the bag would stand up on its own when not filled. I am really pleased with the results.


A photo posted by katrina (@khcalgary) on

Of course I had to use some super cute Tula Pink fabric for the bags. I also made myself a bag from my precious Parisville fabric with a splash of Moonshine.


Wednesday, May 21, 2014

Noodlehead Road Trip Case

Here is the roadtrip case I made, a pattern from Noodlehead. I think it's so cute in the washi fabric! I just need to add kam snaps to it and it will be finished! I'm going to buy long clear cases to use in the long pockets for all my sewing odds and ends.

Tuesday, May 6, 2014

PS Bella Pouch

How delightful is this little quilted pouch? I finally found the wavy stitch button hiding on my machine and decided to make this. I saw a friend on instagram mention that this pouch fits her instax mini perfectly. And since I've been dying to travel with mine, I need a case! 

The pattern is from Pink Stitches and doesn't call for batting but I quilted each piece (lining and main) with batting so there would be extra padding for the camera. So basically there are two layers between the fabric. It makes the bag sturdy and soft!
I added a large denim pocket to the back of the bag to hold extra film, and only made a small pocket for the inside since I am not planning to keep much inside with the camera. I used a KAM Snap for the closure instead of velcro. I hope you enjoyed my project! Here is a link to a flickr showcasing the other bags made from this pattern!

Sunday, March 23, 2014

Seven Point Star

#patchwork sunday! #epp #sevenpointstar #sew #sewing
Here is my latest project, a seven-point star! I'm really enjoying the EPP (English Paper Piecing) technique and sewing the pieces by hand.
new details! #sevenpointstar #epp #patchwork #sew #sewing
I am excited to add some small applique details as I go, I hope they will add interest and help me make this truly one of a kind.

#starquilt progress! #epp #patchwork #sew #sewing

I had to piece three small scraps together to finish one of the navy points. I don't think it is too noticeable. Thankfully I had just enough!

#starquilt progress #epp #patchwork #sew #sewing

I was questioning the scrappy pink center, but am loving the choice more and more. I think it helps add some movement. Thank you for looking!

Tuesday, March 18, 2014

Boxed Zip Pouch Tutorial

Katrina Hertzer of Nizhoni Workshop

Hi! I'm Katrina from Nizhoni Workshop, the small blog where I share my projects. I'm a mother of three young children and I love to sew and create. My passion is patchwork and I'm a member of the Calgary Modern Quilt Guild. I love bold pattern on pattern, anything Tula Pink and am currently in love with medallion-style quilts. I enjoy creating designs which incorporate my Navajo heritage and love of modern quilting.

Today I'd like to show you my method of creating a boxed zip pouch. There are many ways to achieve a similar result and I won't be recreating the wheel. This is simply my way of sewing that takes minimal effort to achieve a great result.

Boxed Zip Pouch Tutorial by Nizhoni Workshop


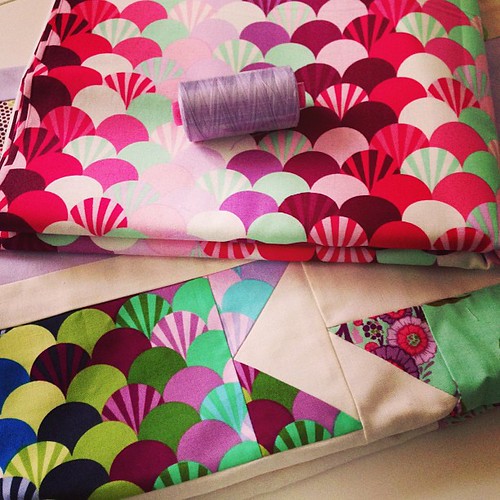
The supplies you will need for this tutorial:

Fabric (for this tutorial we will be using Sew Sister's November 2013 Kona Cotton Solids Grouping)
Lightweight Fusible Interfacing
one 14" to 18" zipper
Warm & Natural Batting (or similar)
3" of woven tape or ribbon for tabs (not shown here)
Basic sewing notions and tools


 Please start by pressing your fabrics. 
Choose one fabric as your lining. Cut a 10" x 11" piece. Cut and fuse a 10 x 11" piece of lightweight fusible interfacing to the wrong side of lining fabric using the fusing instructions for your interfacing. Set aside.

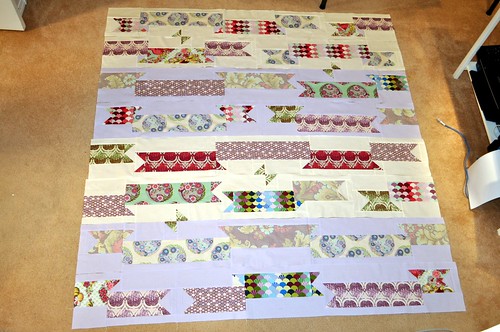
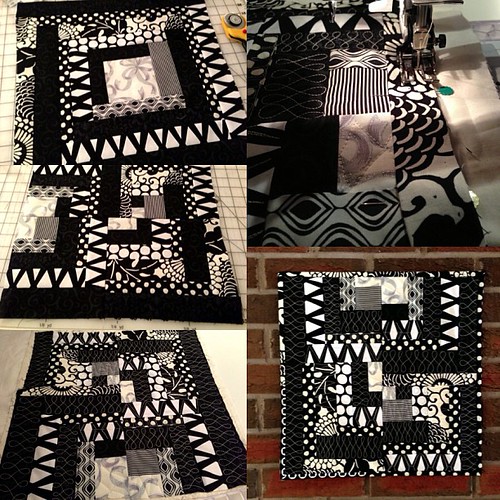
Stack remaining lining fabric with the other three solids, cut strips of random widths using your scissors or rotary cutter. Cut three or four strip stacks.


Randomly choose strips and sew together. Keep sewing together until you are satisfied. Now, try cutting the piece in half and sew back together so you have more of a "rectangular" shape.


Now try adding strips going different directions. Using small bits of color here and there can make it interesting, you could also use small fussy cut pieces of fabric to showcase. However, for this tutorial I am using solids.


Keep adding until your rectangle is a little larger than 10" x 11".


Lay your interfaced lining piece on top of your patchwork and trim patchwork down to size. Using a couple pins helps keep the materials from slipping. Set aside your lining piece again.


Take your patchwork rectangle and lay down on a small piece of Warm and Natural or similar batting. I trim to about 1/2" on each side. You can choose to use basting spray but since this project is so small, it won't be necessary.


Randomly straight stitch up and down and across your patchwork to quilt. You can also free motion quilt if you prefer.


After you are happy with the quilted lines, lay your lining piece back on top, right sides together, of your quilted patchwork and trim to size of lining.


Keeping your zipper closed, lay zipper facing down on top of the quilted patchwork top edge (10" side).


Lay the top edge of the lining, interfacing (wrong) side up, on top of the zipper and patchwork piece. Pin at ends and once in the middle at least. I also like to use a JEANS needle in my machine because these layers are bulky and I hate finding skipped stitches. Using a zipper foot is not necessary as the layers are quite thick and you will hardly notice a difference.


Take your time and sew a 1/4" seam. Remove pins as you sew.


Open your seam and press open. Be careful not to melt your zipper.


Top stitch close to the edge, about an 1/8th of an inch away.


Now fold over the quilted patchwork layer so right sides are facing each other, fold the lining to the back, right sides facing each other. Align all edges to the top of the zipper.


Pin on the ends first so the edges are aligned. Pin middle area.


Sew a 1/4" seam, removing pins as you go.


Open zipper and open seam and press carefully. Top stitch and 1/8" away from edge like the other side.


Close the zipper (lining facing out) and use a pin to hold place and make with a water soluble marking pen or chalk. Or finger press. Do the same for both sides.


Lay your zipped bag so the zipper pull is on your left side, we will work with the right side (with the zipper stop) first. Take your woven tape or ribbon and cut to 1.5" length and fold in half. Center the tape on the mark and pin.


Make sure the cut edges are aligned with the edge of the bag. Stitch in place 1/8" away from the raw edge.


Align the mark over the top of the zipper and pin along the edge. (Make sure that the first side you sew is the side WITHOUT the zipper pull)


Sew a 1/4" seam along the pinned edge. When you sew across the top of the zipper go very slowly and back stitch a couple times. Cut off the excess zipper. Zigzag your raw edges so they are nice and neat.


Now, working on the other side, slightly pull the zipper open.


Holding the zipper as closed as possible, stitch SLOWLY back and forth across the zipper about 1/8" away from the raw edge of the bag.


Trim the excess zipper end. Repeat the steps for attaching the woven tape again for this side. OPEN your zipper now. Align the zipper over the middle of the tape and pin. Before you stitch the seam, please ensure the zipper is open. Sew the seam as you did for the other side.


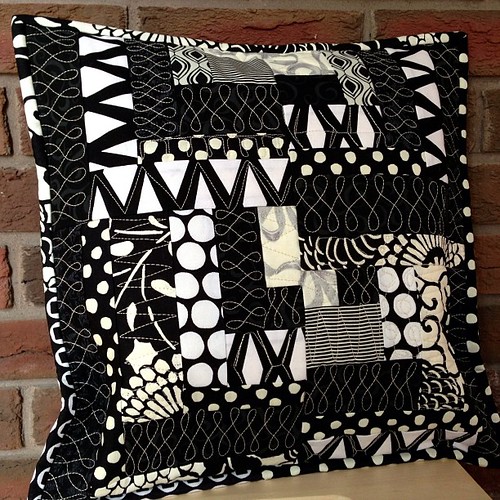
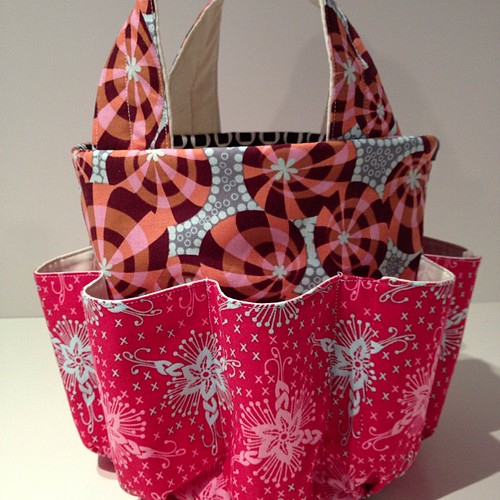
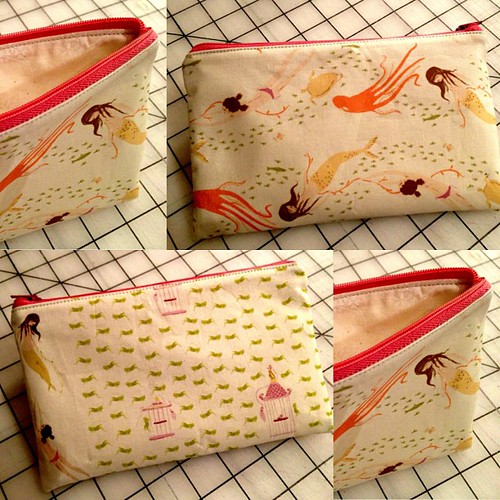
Here is your pouch! Now to box the sides.


Using a temporary marking pen or chalk, carefully mark about 1.5" from the edge along the folded crease for all sides of the bag.


Open one side of the box like the photo below. Align the pin on the front with the mark you made on the back.


Using a cutting mat or ruler, align the point of the triangle like the photo below shows. The line I drew with the marking pen is 2" long.


Sew on the marked line back stitch at beginning and end. Trim excess fabric about 1/4" away from seam. Zigzag raw edges. Trim threads and remove the temporary marking pen or chalk lines. Repeat for all sides.


Your finished boxed zip pouch! Now turn the right side out.


Finished boxed zip pouch!


Please share your finished project pictures with me, tag me @khcalgary on Instagram or on flickr!

Friday, March 7, 2014

Reversible Sunday Sling

i love pictures of babies in bags! #amybutler #sundaysling #sew #sewing

I love pictures of babies in bags, so here is my littlest in the bag.

Reversible Sunday Sling

Today I finished my Reversible Sunday Sling, a pattern by Amy Butler. Compared to the Weekender Bag pattern, this was really easy. The pattern pieces themselves can be a little confusing at the beginning but once you understand the process cutting is easier. I used warm n natural instead of fusible fleece.


Reversible Sunday Sling

I only had one yard of the main home dec fabric so I used the lining fabric for both sides of the handles. I think it helps to quiet the print. I had to piece a small portion to make one side panel for the bag. Otherwise, the yard was just enough.


Reversible Sunday Sling

There is a small cell phone pocket hidden inside one of the large pockets. It is one of my favourite details of this bag. I made the large version of this bag and it is really really big!

Wednesday, February 19, 2014

Quilted Zipper Pouch

Quilted Zip Pouch by Nizhoni Workshop
I just received some half yards of Tula Pink's Fox Field fabric yesterday and knew I had to make some thing fast!. I loved a small zipper cross-body pouch I saw in Patchwork Tsushin and decided to make a simpler version as a zipper pouch. I used fabrics from several Tula Pink fabric lines and paired them with a beautiful Kona Cotton. I won't ever be able to give this away. I love it so much!

Monday, February 17, 2014

Mini Camper Pincushion

How much do you love this pincushion? It's one of three mini camper patterns in Fresh Quilts Magazine Spring/Summer 2014 issue. These are really cute. While reorganizing my scraps I thought I should use some Tula Pink scraps to make this. A little bit of denim cut from jeans alterations made this a little more durable. I also lined the cotton side panels with a lightweight fusible to make it a bit more sturdy. All I need to do is search for some coordinating buttons for wheels and attach a handle for the door.

The pattern was a little confusing but I made the best of it. I absolutely love it!!!


Tuesday, January 28, 2014

A mini pincushion

Today I made a mini pincushion for one of the small compartments on my Poppin tray organizer. These desk accessories come in the most wonderful colours and this blue was my favourite. I decided to use scraps to make this.

I really love how the random patchwork makes an impact!

Of course my favourite part of the whole process was machine quilting the top. Thank you to all my new followers! xoxo

Wednesday, January 22, 2014

Seminole Patchwork

I've been playing with different Seminole Patchwork designs lately. I think I want to do more of this style.

Here is some work on a larger scale patchwork design.

As I was cutting the strips for this smaller design, I kind of liked the bottom layout. After a quick instagram vote, I decided to keep with the original layout with more black in the center.

My finished block.

Sunday, November 10, 2013

Biye' Quilt

Biye' Quilt
This is my newest work Biye' quilt. The Navajo to English translation is "his son." This is a quilt for an old friend who is expecting her first child.

Biye' Quilt
The quilt is backed with a soft and cuddly minky which will keep the baby warm during the winter season.

Biye' Quilt

Monday, September 30, 2013

Marcelle Medallion Quilt by Liberty Love

Well I finally finished my Marcelle Medallion Quilt by Liberty Love! Here is a series of photos with my progression....

#marcellemedallion border 3 finished! #libertylove #patchwork #sew #sewing #medallionalong making my next border -- yay! #marcellemedallion #medallionalong #patchwork #sewing #sew border 4 complete! #marcellemedallion #medallionalong #patchwork #sew #sewing #marcellemedallion border 5! #patchwork #sew #sewing #medallionalong #marcellemedallion border 6. thanks to #sewingsummit lecture, i totally stepped up my photography skills! #patchwork #sewing #sew #quilting #quilt #mmal #medallionalong #libertylove #marcellemedallion border 7, almost finished! #mmqal #medallionalong #patchwork #sewing #sew #fabric #marcellemedallion border 8 means i'm finished! i'm going to add some borders to make it longer... #medallionalong #mmqal #patchwork #sew #sewing #color #quilt

I'm going to add additional borders to the top and bottom to make it a longer lap quilt.

Thursday, April 25, 2013

A Quilt for Leukemia and Lymphoma

one last snuggle before we sent this #quilt away!
A quilt I made a year ago finally is going to find a new home! My friend Stephanie and her friend Abe are working to raise $100,000 for the Leukemia and Lymphoma Society. Which is truly ambitious and exciting! I thought maybe this quilt could help them raise some funds. It's a bright and happy quilt and I'm excited to see it go! If you would like to find out more about their efforts, please visit this link.

Free form blocks

Tuesday, April 23, 2013

Parisville Quilt

finally ready to #quilt my @tulapink Rubans Pour Les Cheveux quilt designed by @j_q_adams #quiltdad
I finally purchased some Parisville fans in pomegranate to back my quilt! I also chose a variegated thread to quilt with. Now just to sandwich and baste!

Rubans pour le Cheveux
Here is a photo of the quilt top that was finished a couple years ago! It is a pattern by Quilt Dad for Free Spirit!

Tuesday, April 16, 2013

FLQS Progress

should i add this little border to the bottom? Here is my FLQS swap progress so far. I added the strip to the bottom and think I will start quilting it now. I hope she likes it!

Saturday, April 13, 2013

Pink Penguin Paper Piecing

#patchwork progress #sewing #paperpiecing #pinkpenguin #popsicle
I decided to do a little Pink Penguin paper piecing for my FLQS partner. These are such fun blocks to make.

hello there! #sewing #patchwork #paperpiecing #pinkpenguin
I really love this indigo coloured block.

#words #embroidery
I'm adding some machine embroidered wording to the small quilt as well.

Friday, April 5, 2013

Marcelle Medallion Quilt

Marcelle Medallion Quilt
So this is my progress so far, border number two is on! I love all of the scraps in this quilt! It is soooo much fun to make!
Marcelle Medallion Quilt
Here is after I put border number one on.
planning the next border #marcellemedallion #patchwork #sewing
This is where I looked at the book sample and tried to imagine where I needed to go! I think adding the chambray border was a good pick! Follow the fun on instagram!

Thursday, April 4, 2013

Pillow Cover finished!

finished #pillow #sewing #patchwork
I decided to make a quick gift for my parents in law's 50th wedding anniversary. Just about the only things they decorate with are small pillows in their minimalist style home. So I thought I'd make something they could use. Here is a look at the process:

#pillow making #sewing #patchwork #diy
The cover is fully removable with a zipper and can be washed separately from the pillow. It is also quilted with warm n natural so it stands nicely on its own.

#patchwork pillow! #sewing

Tuesday, January 22, 2013

Bingo Bag

my new #bag
Here's my latest creation. A new bag for all my bingo supplies. I'm still fine tuning the pattern. I'm so excited for the next time I go!!!

Thursday, January 10, 2013

Easy Zip Pouch

small zip pouch #heatherross #mermaid

I printed my own fabric sheet using images from Heather Ross' PRINTS book. The images printed incredibly detailed and I am so happy with it. Of course I heat set the inks with my iron before sewing.